Migrating from SOAP to REST using Apigee

Apigee is another option for converting your SOAP services to a RESTful API. I covered Azure API management in another blog post. I will use the same calculator SOAP service to create a SOAP to REST API proxy in Apigee.
From the Apigee edge homepage, select the API Proxies tile.

Click the create “Proxy” button in the right hand corner to start the API Proxy creation wizard.
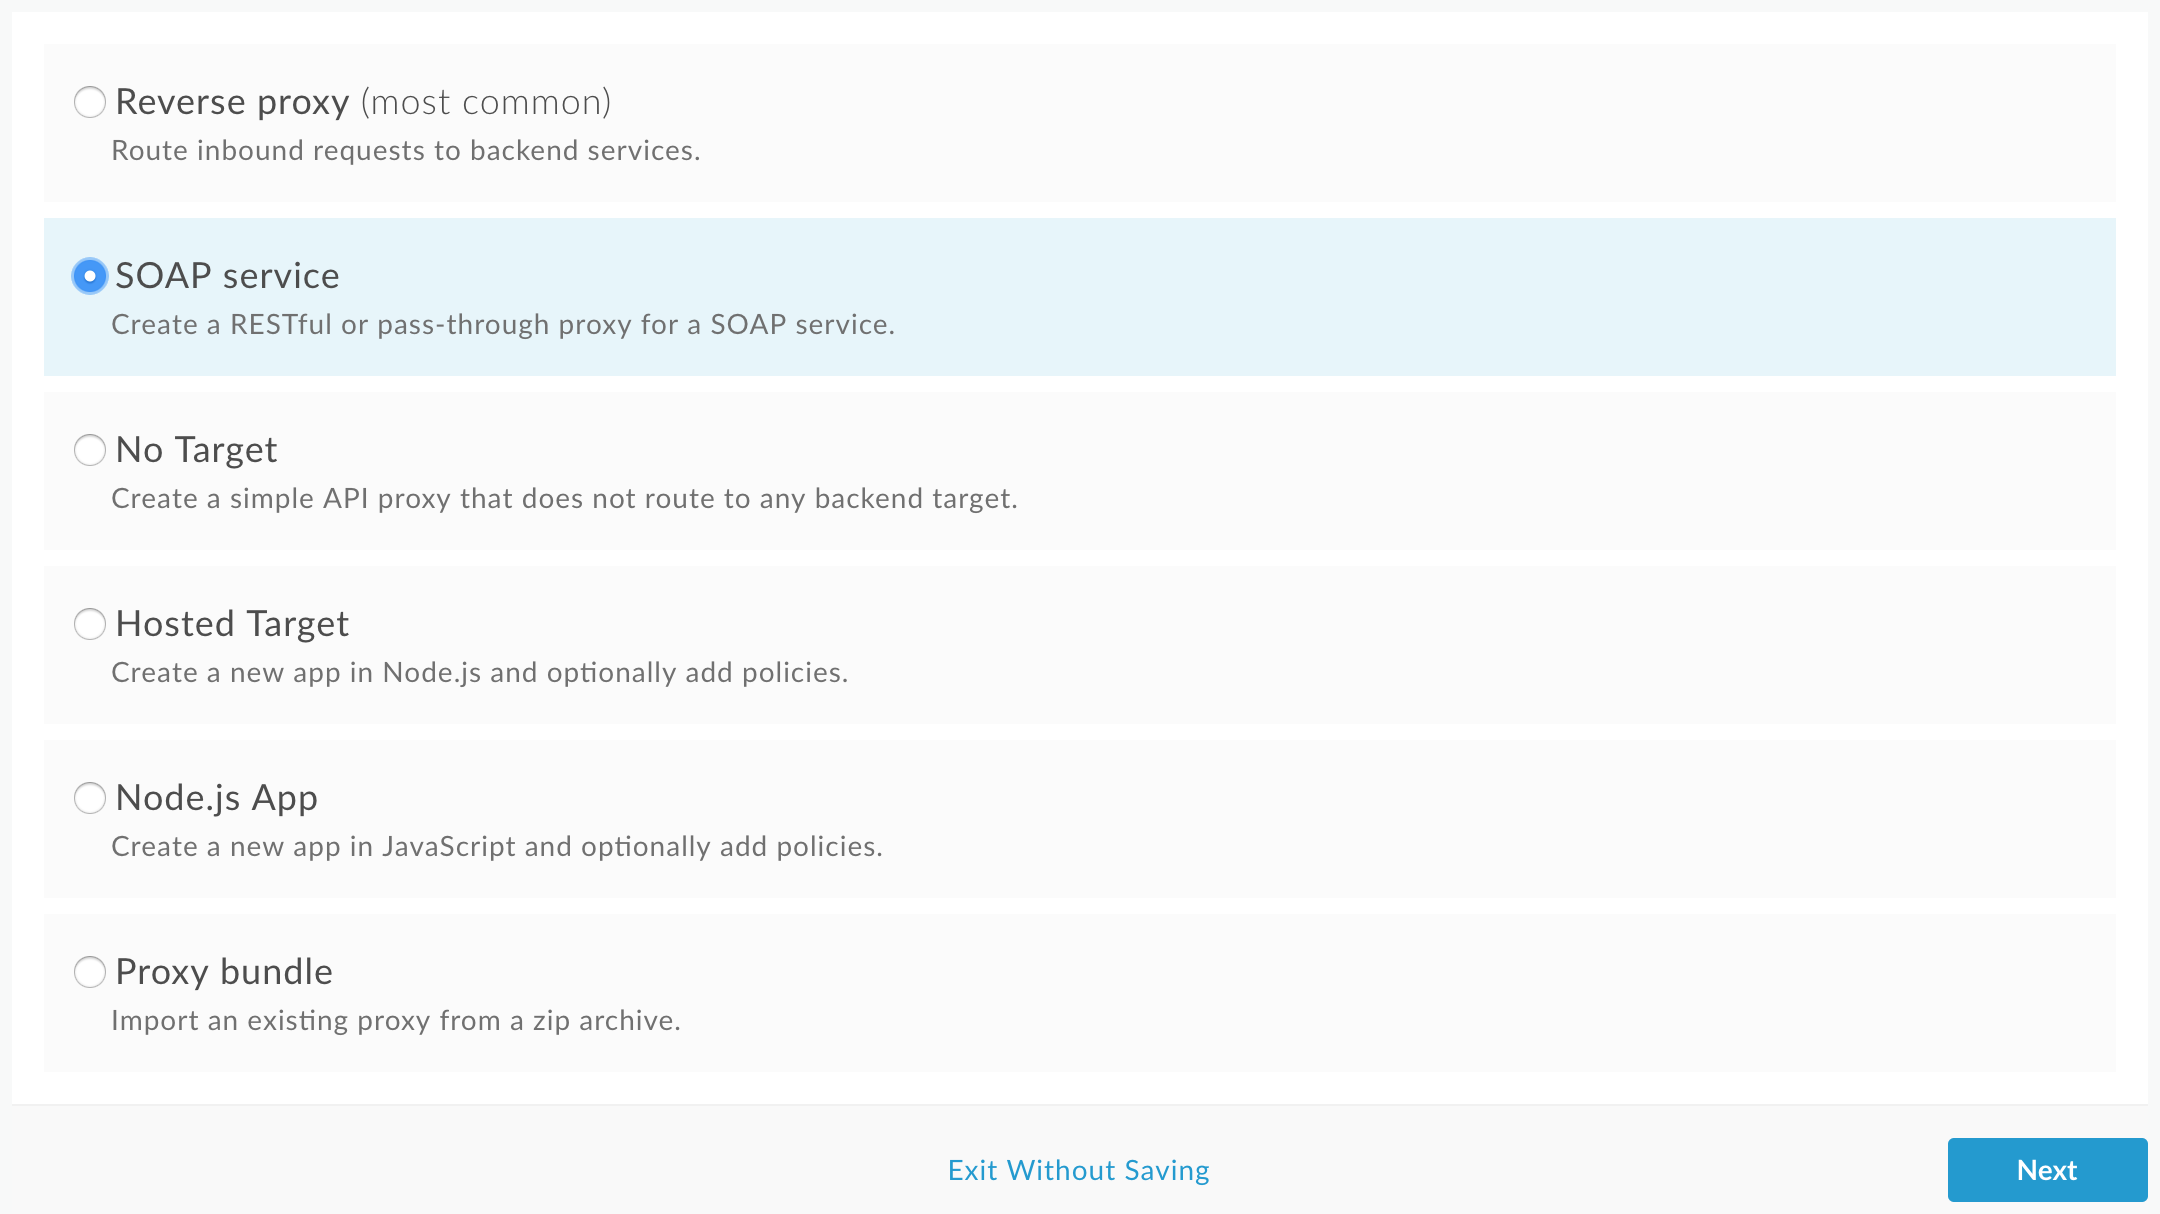
I have chosen the “SOAP service” option and selected continue.
In the next screen, fill out the form as below.
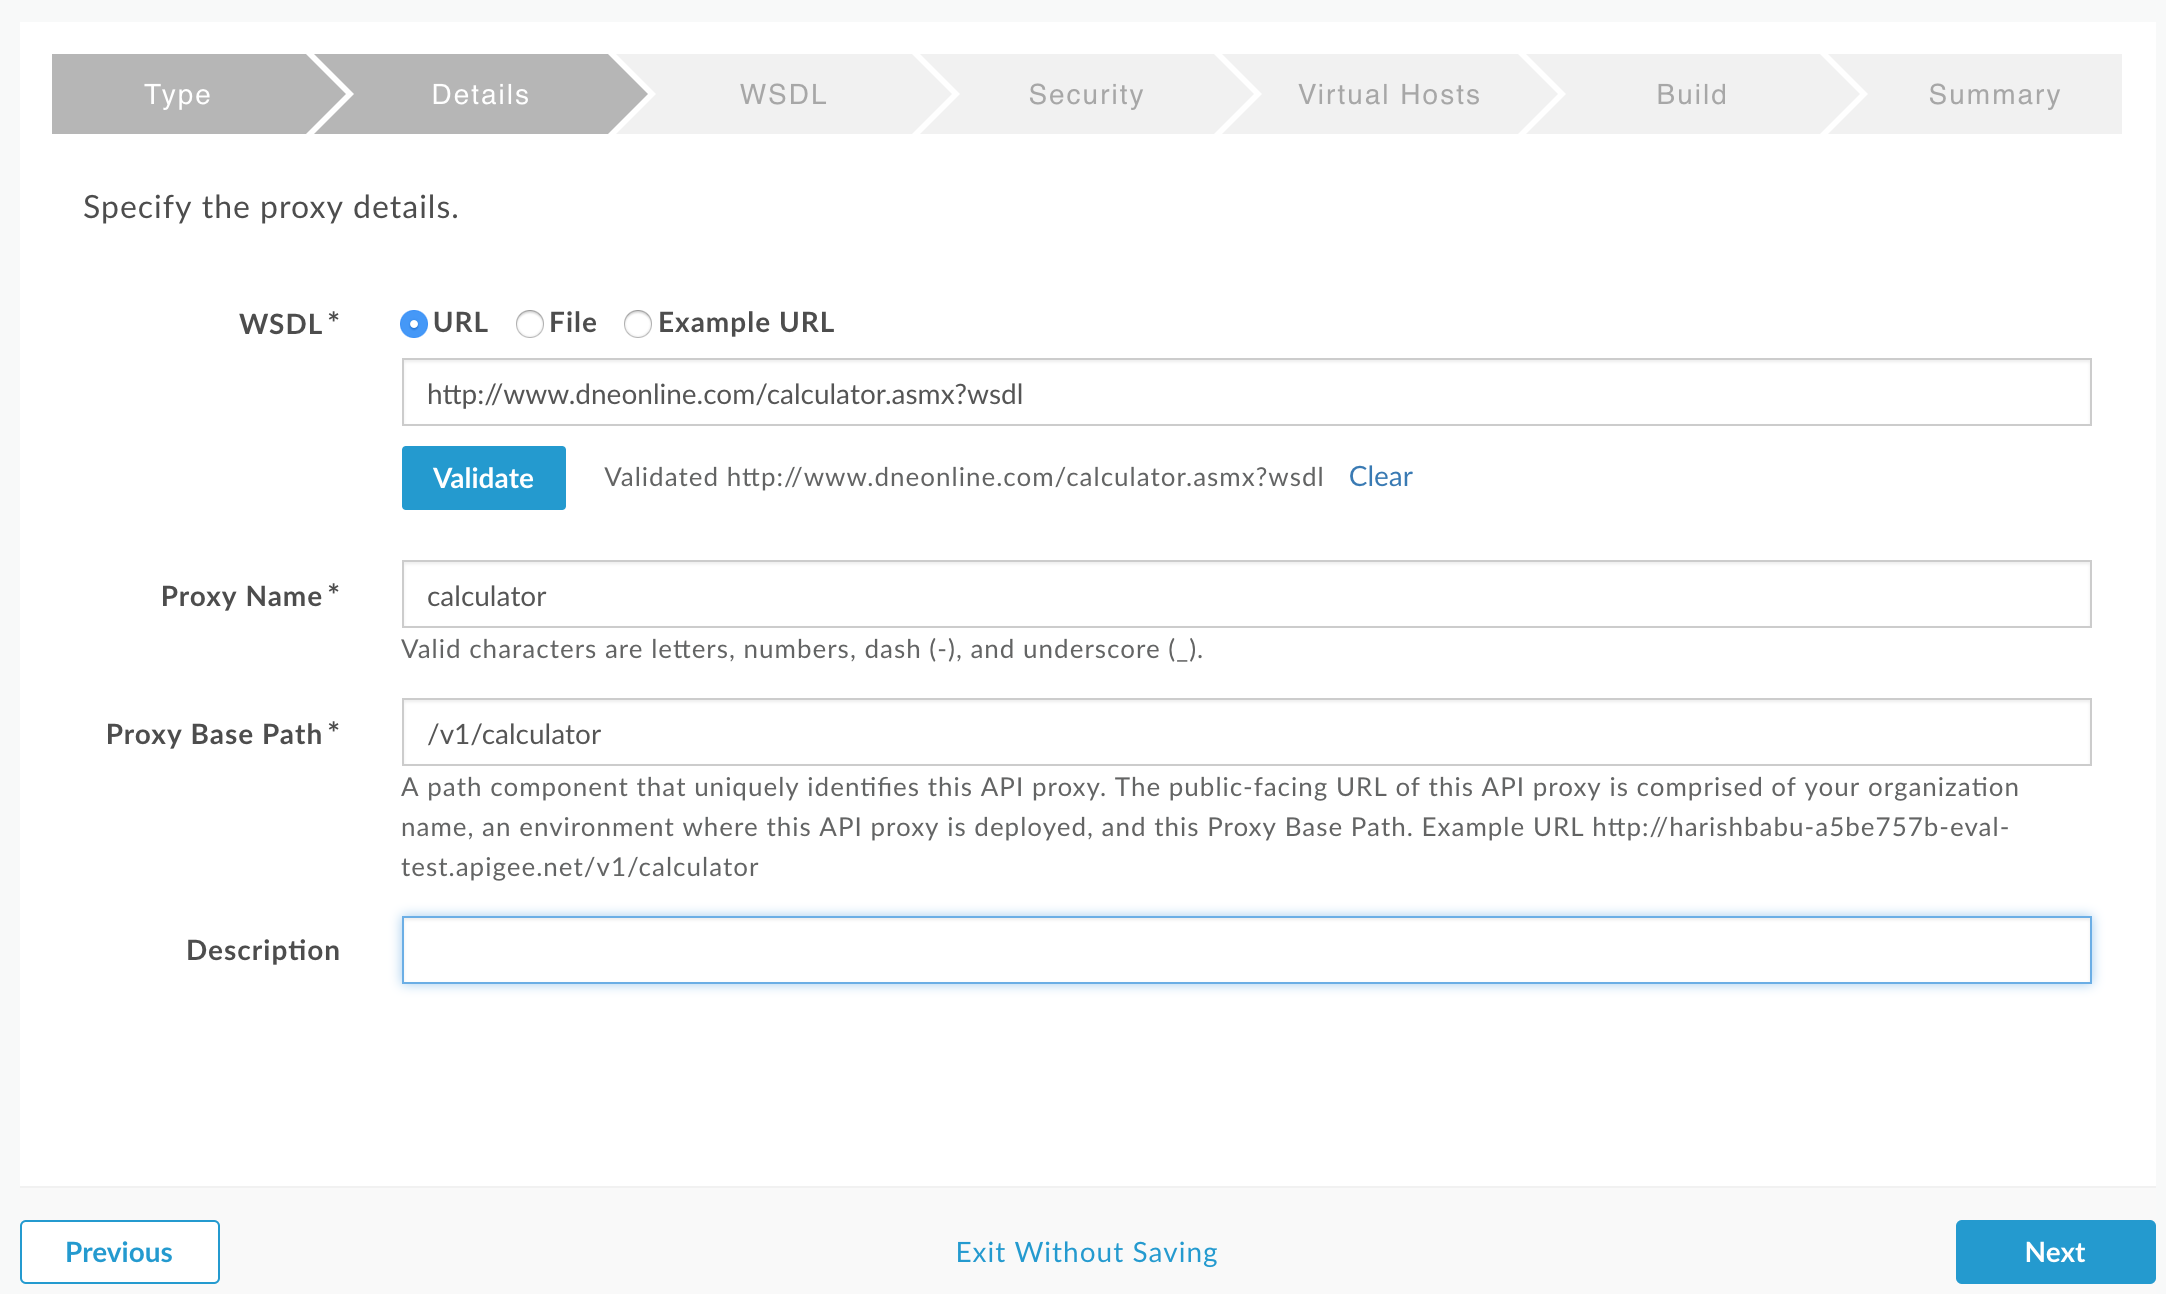
Enter the WSDL URL is the public calculator url and select “Validate”. There is no option to version the API at the point. That means no support for API versioning through header or query string; which are popular options in REST. So, I have included the /v1/ in the base path and selected Next.
In the following screen, specify which WSDL operations to expose in your proxy. Similar to the Azure API Management - SOAP to REST option, there is a Pass-Through SOAP option as well. But, I will choose the REST to SOAP to REST option. Also, notice that I have only selected the first Port Type.
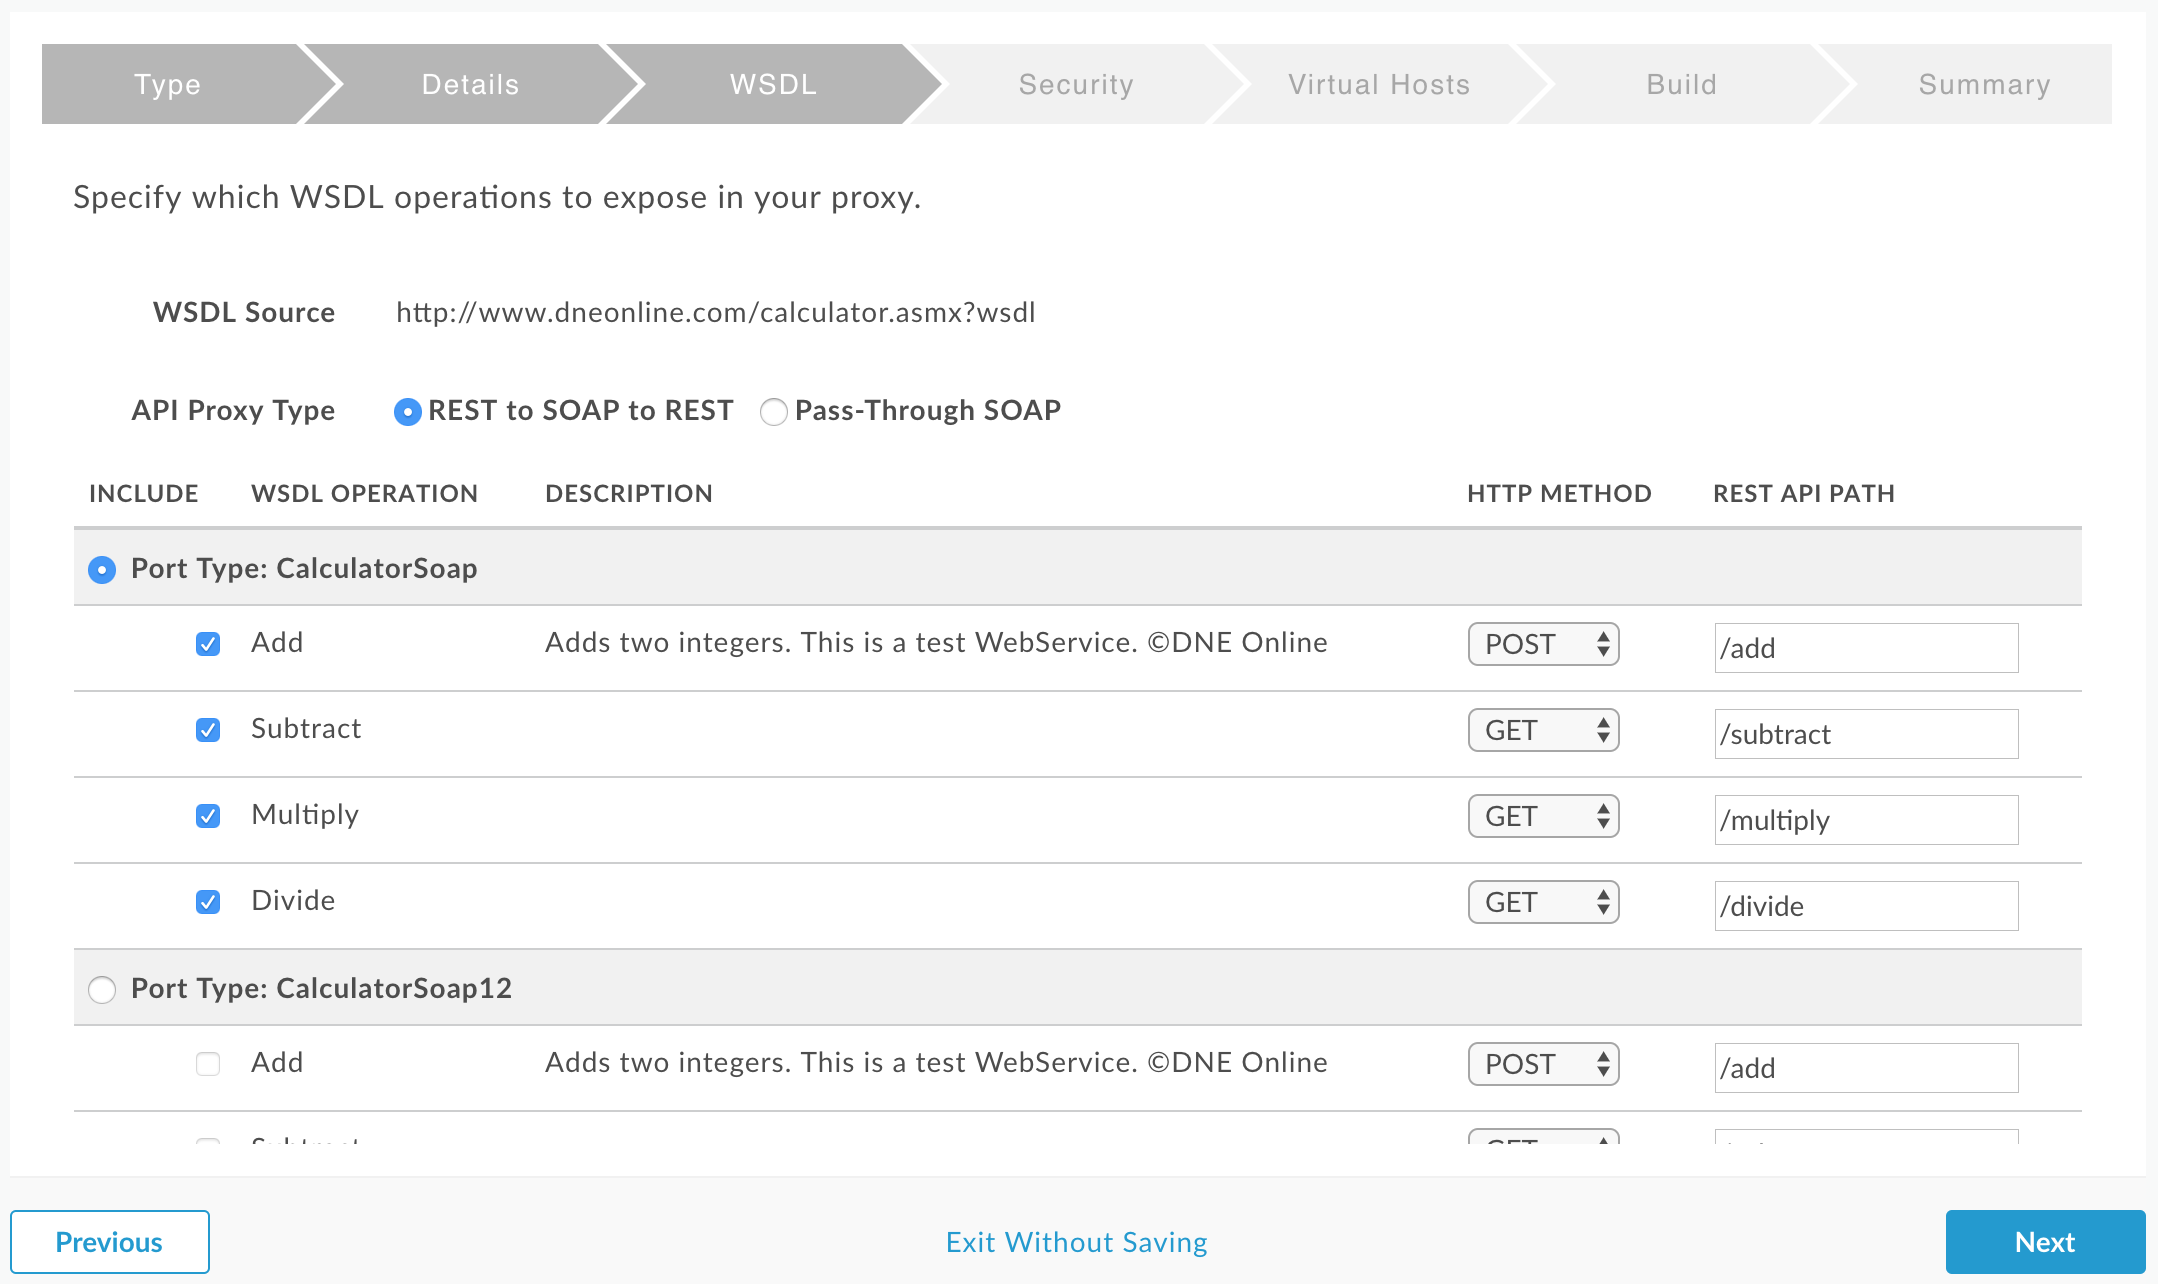
The mapping has for some reason thinks that the operations other than Add should be an HTTP GET method. I will change these to POST and move to the next screen.
The next step is to secure access for users and clients.
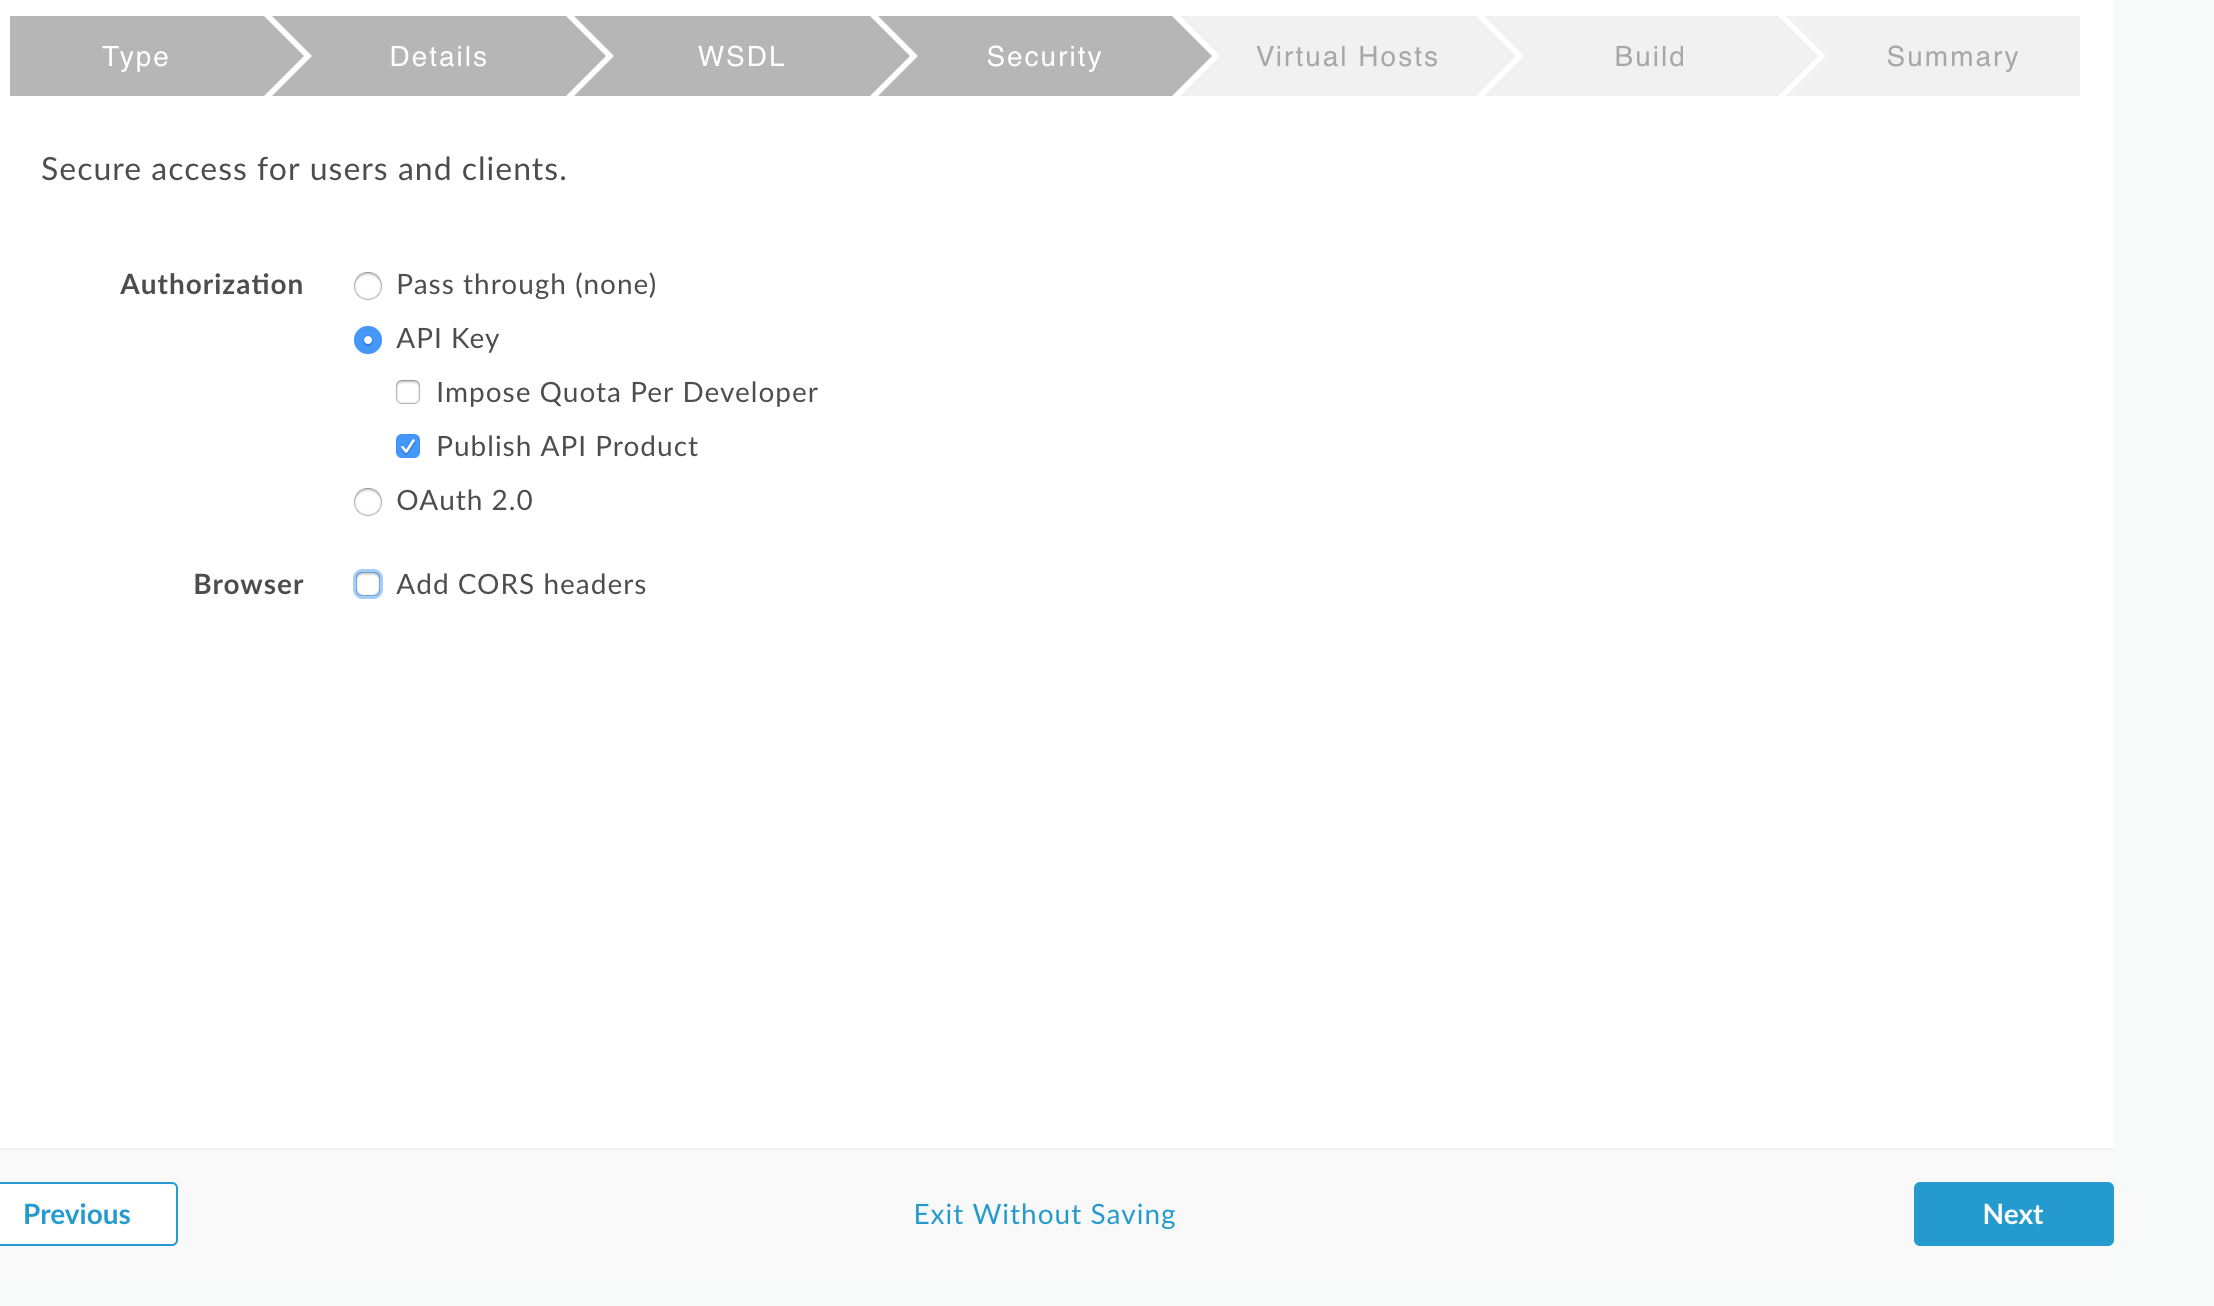
I will select the API key option and also select to publish the product. I am assuming that the product concept is similar to the Azure API Management.
Next section allows you to select the desired virtual hosts.
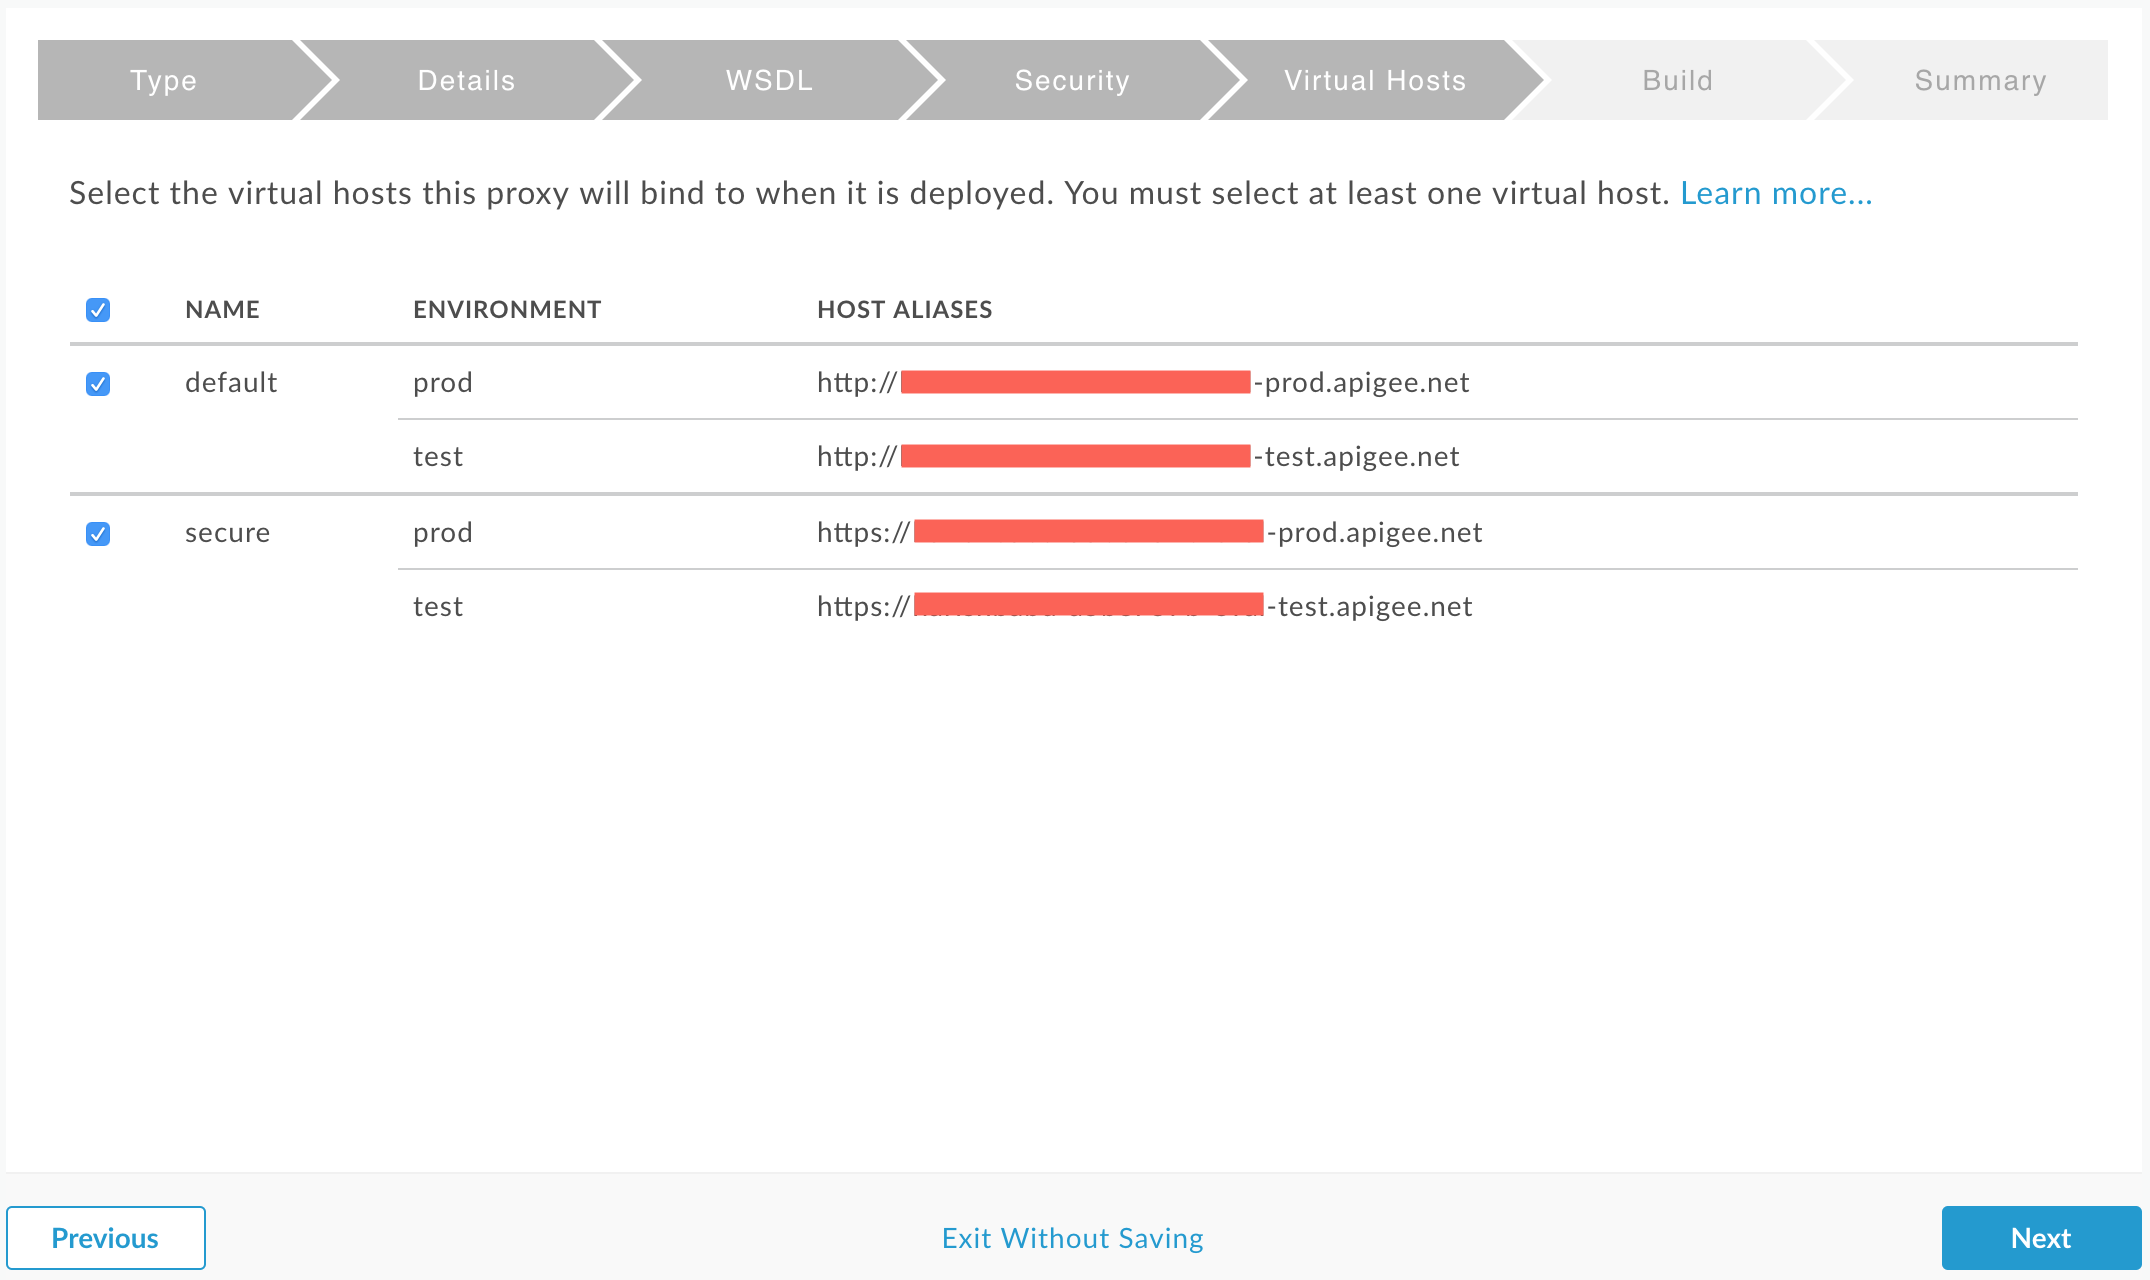
Note: If you plan to use the developer portal, make sure to select the default option (http). Otherwise, the developer portal Try functionality won’t work as it only works for (http).
The trial account that I am using provides you with two environments. Higher tier gives you 3 environments for the proxy.
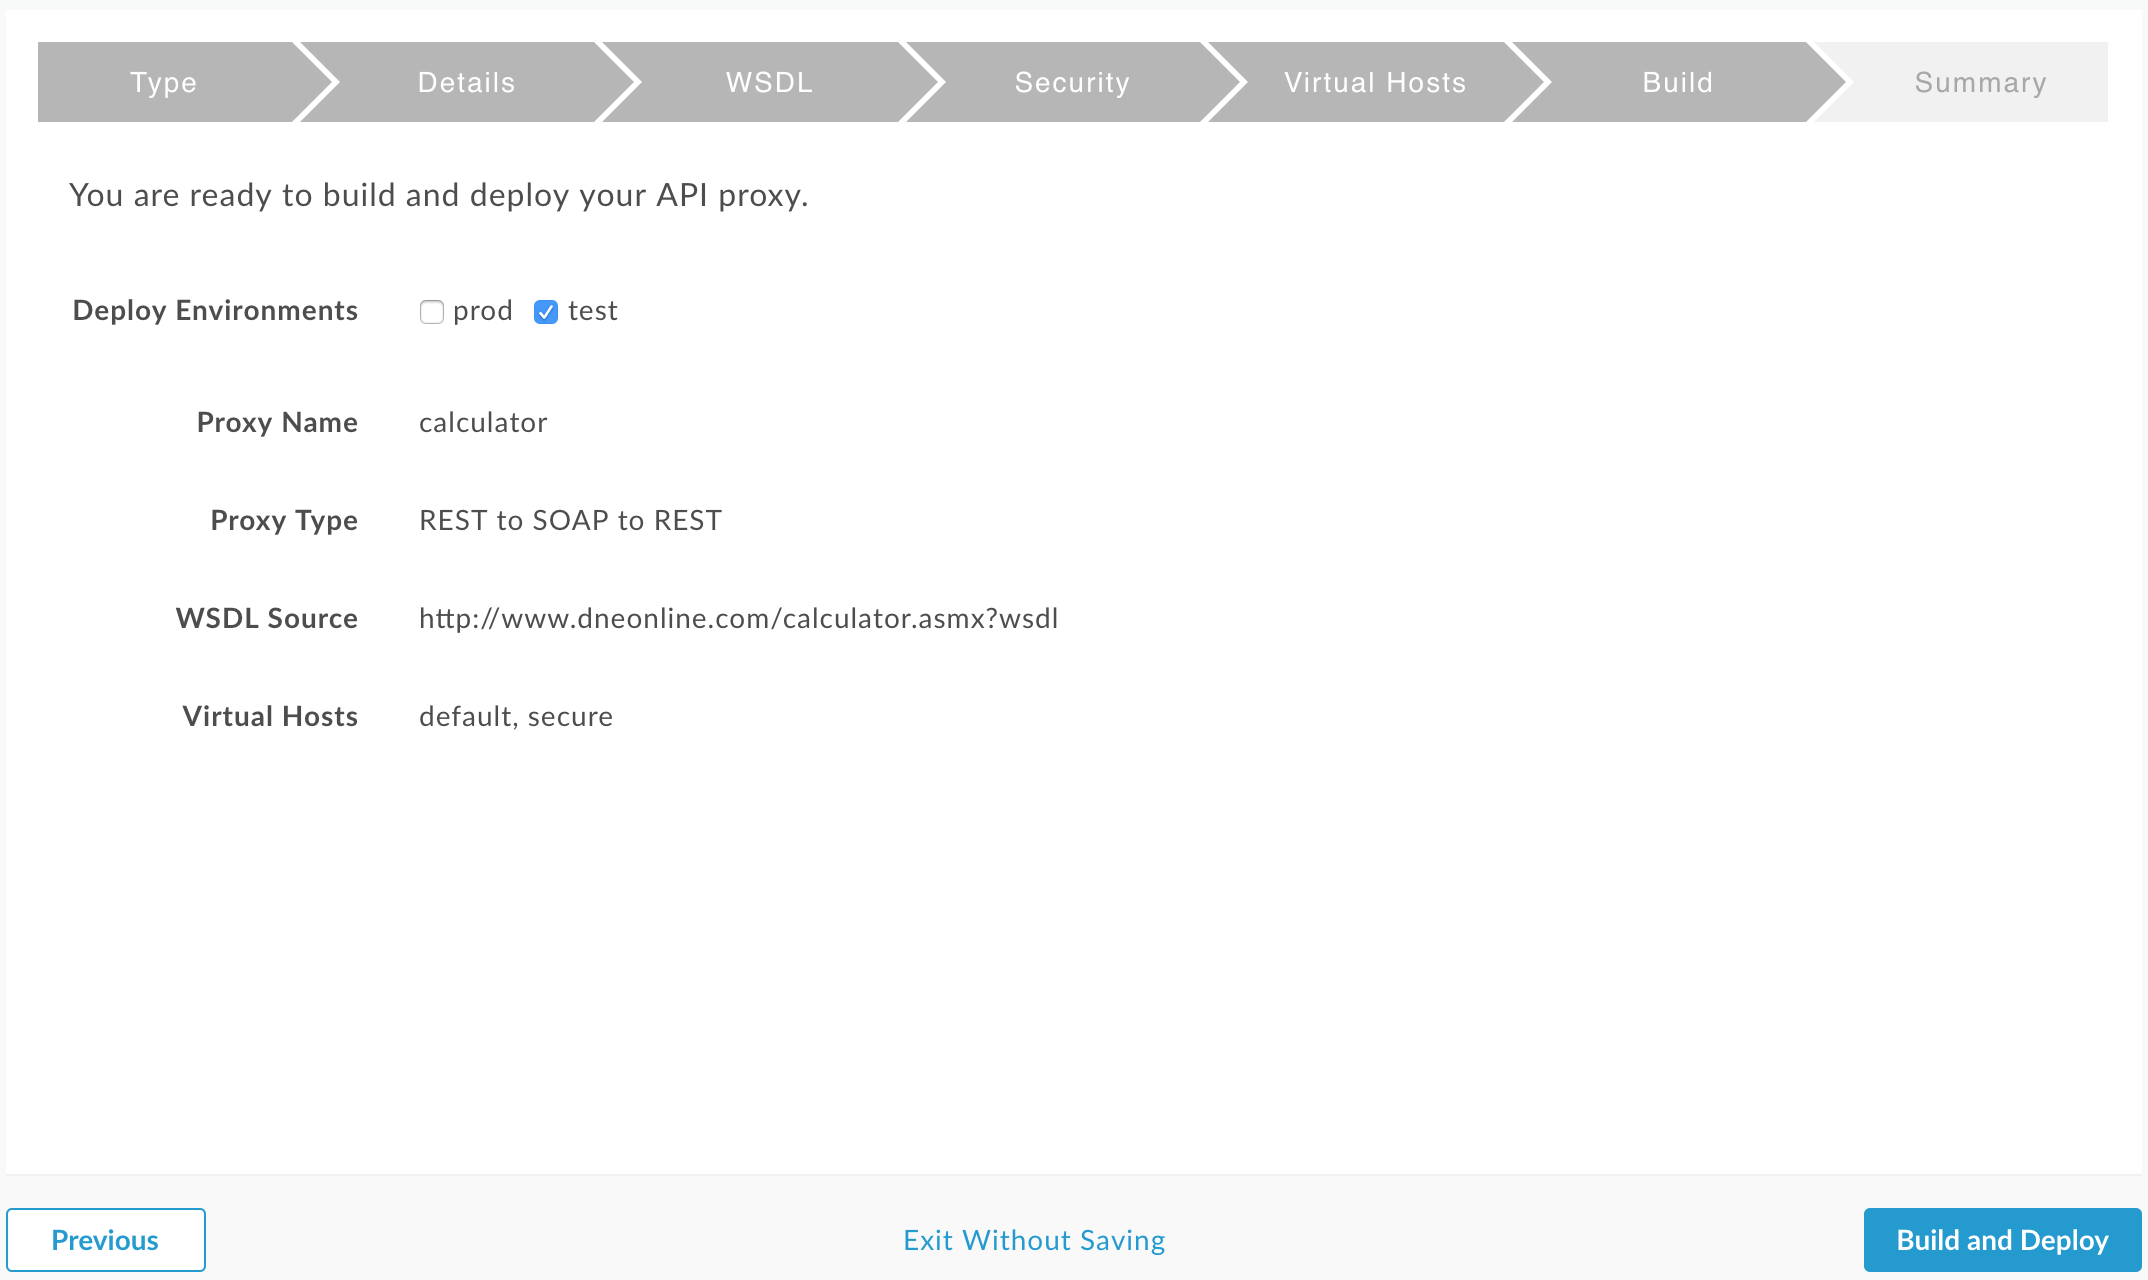
In the build section of the wizard, I am only going to deploy to the test environment. So, will select “Build and Deploy” button.
Once the proxy is build and deployed, navigate to the API proxy overview page by selecting the “View in editor” link. Take some time to familiarize yourself with the different options available to you. Especially the “Develop” tab on the top right hand corner and the policies within there.
Because we selected the option to require API key when making calls to the API proxy, in order to try out the endpoints created you will need to create a new App and assign one of the developer to the App. I created an App called Calculator App and assigned it to the developer came with my trial account.
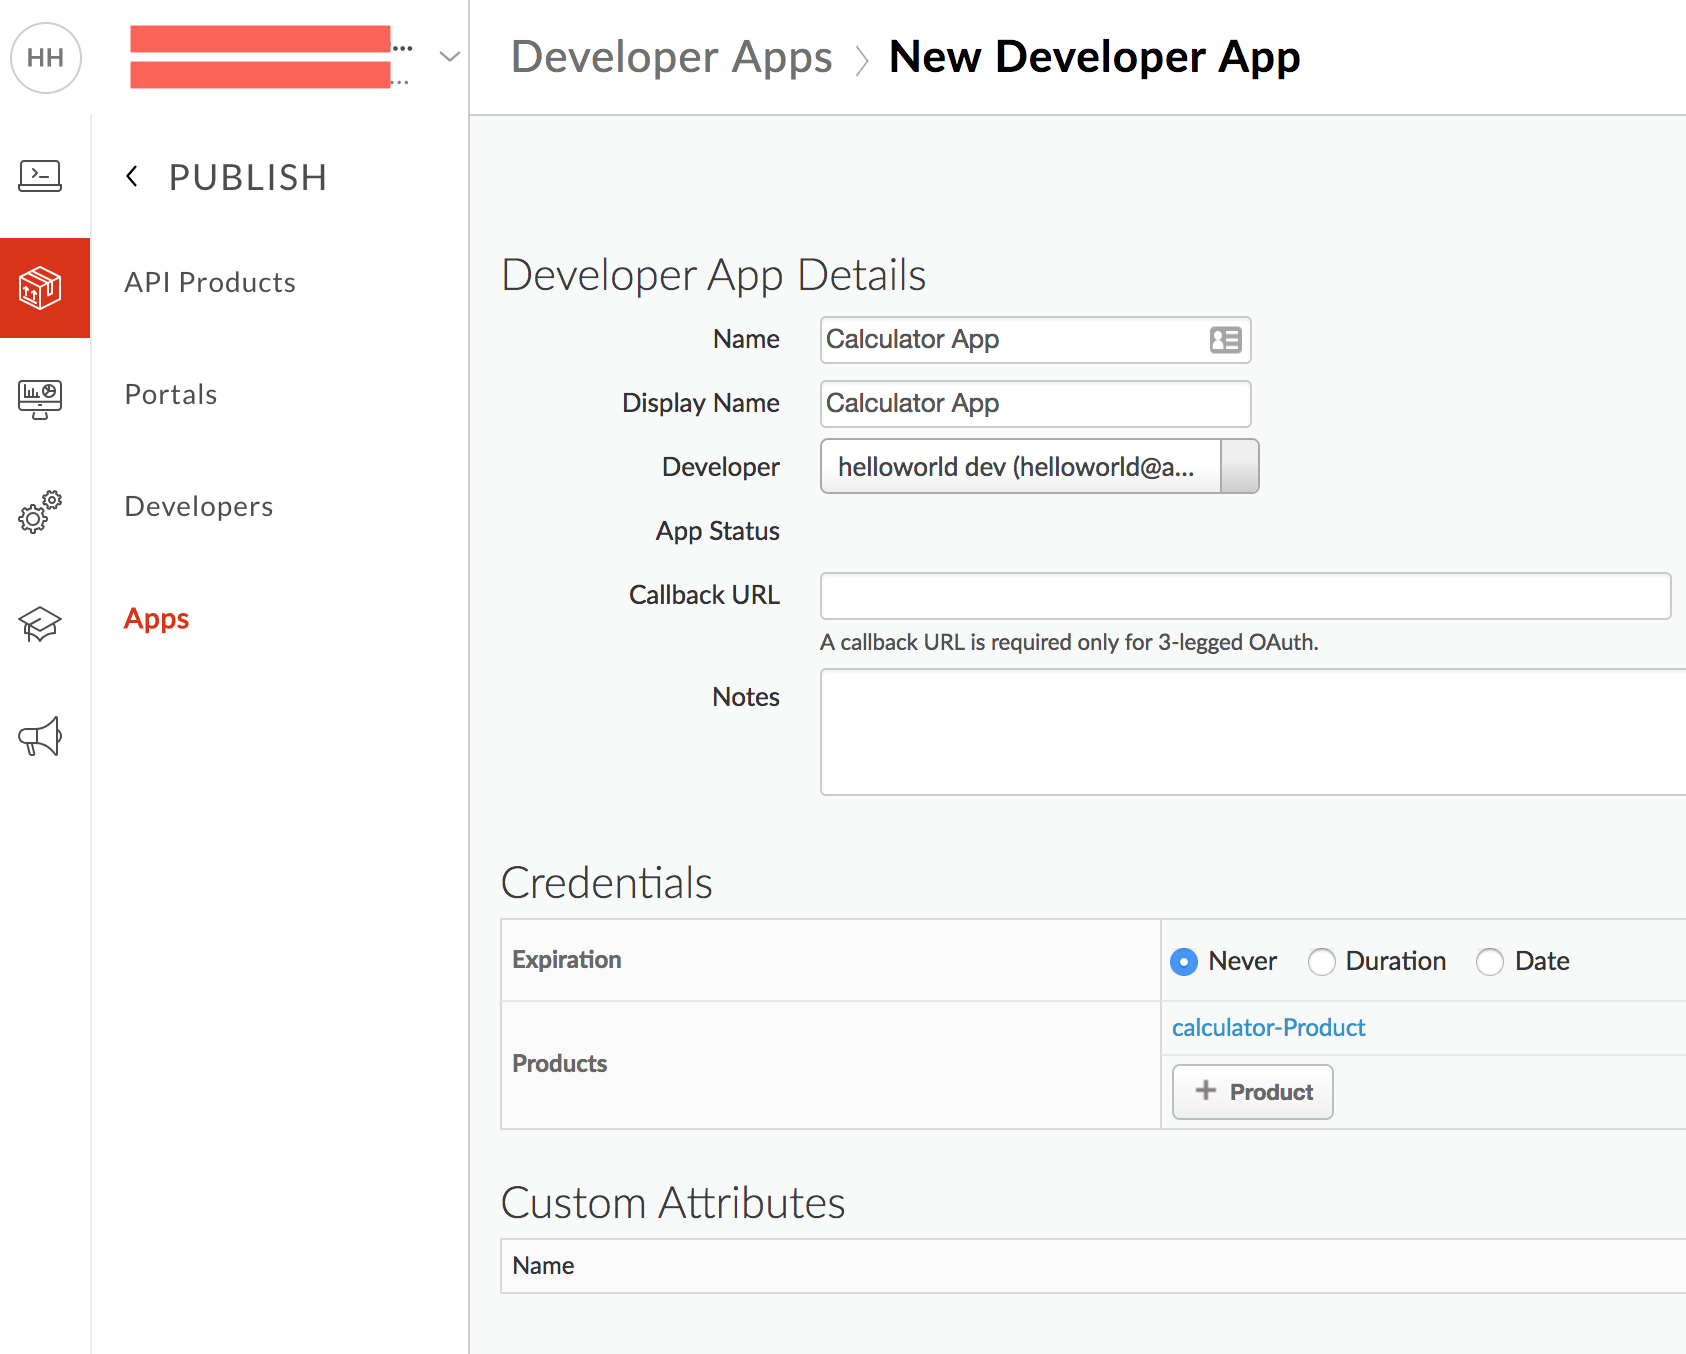
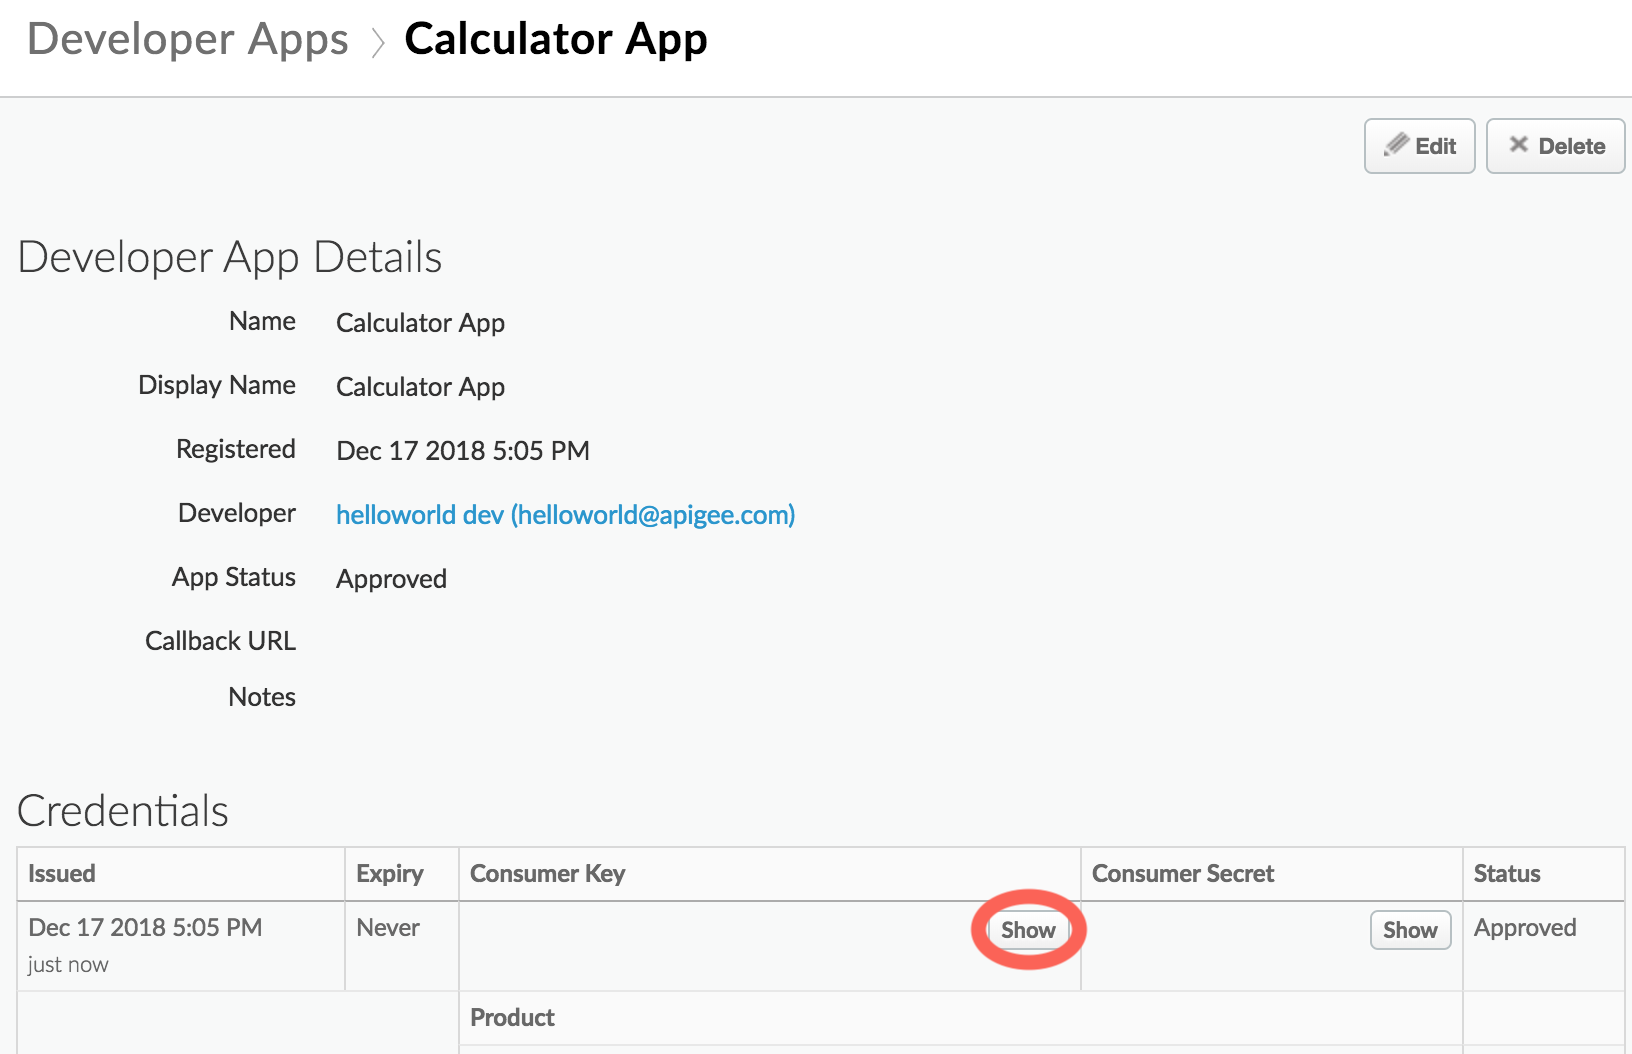
Once the App is created, you can get the API Key from the App Details page, Under credentials -> consumer key (click the “Show” button).
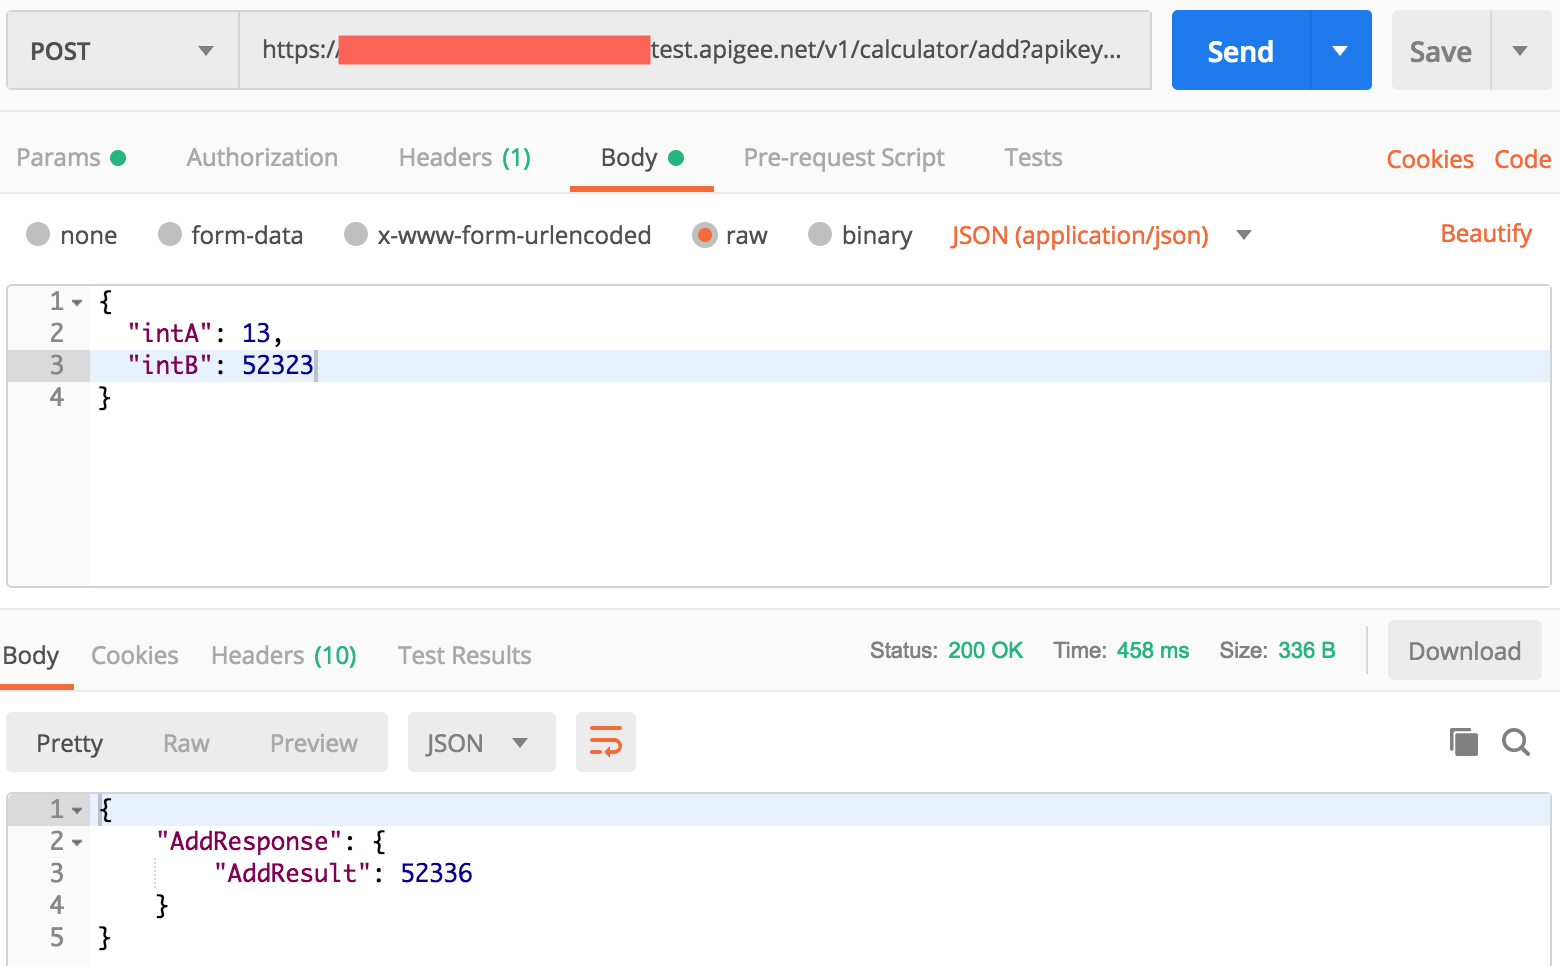
And finally, to try out the API Add operation, use postman or curl to perform the POST /add operation. Note, that the url is case sensitive and api key is expected to be in the query string ?apikey= ********* .
Tracing
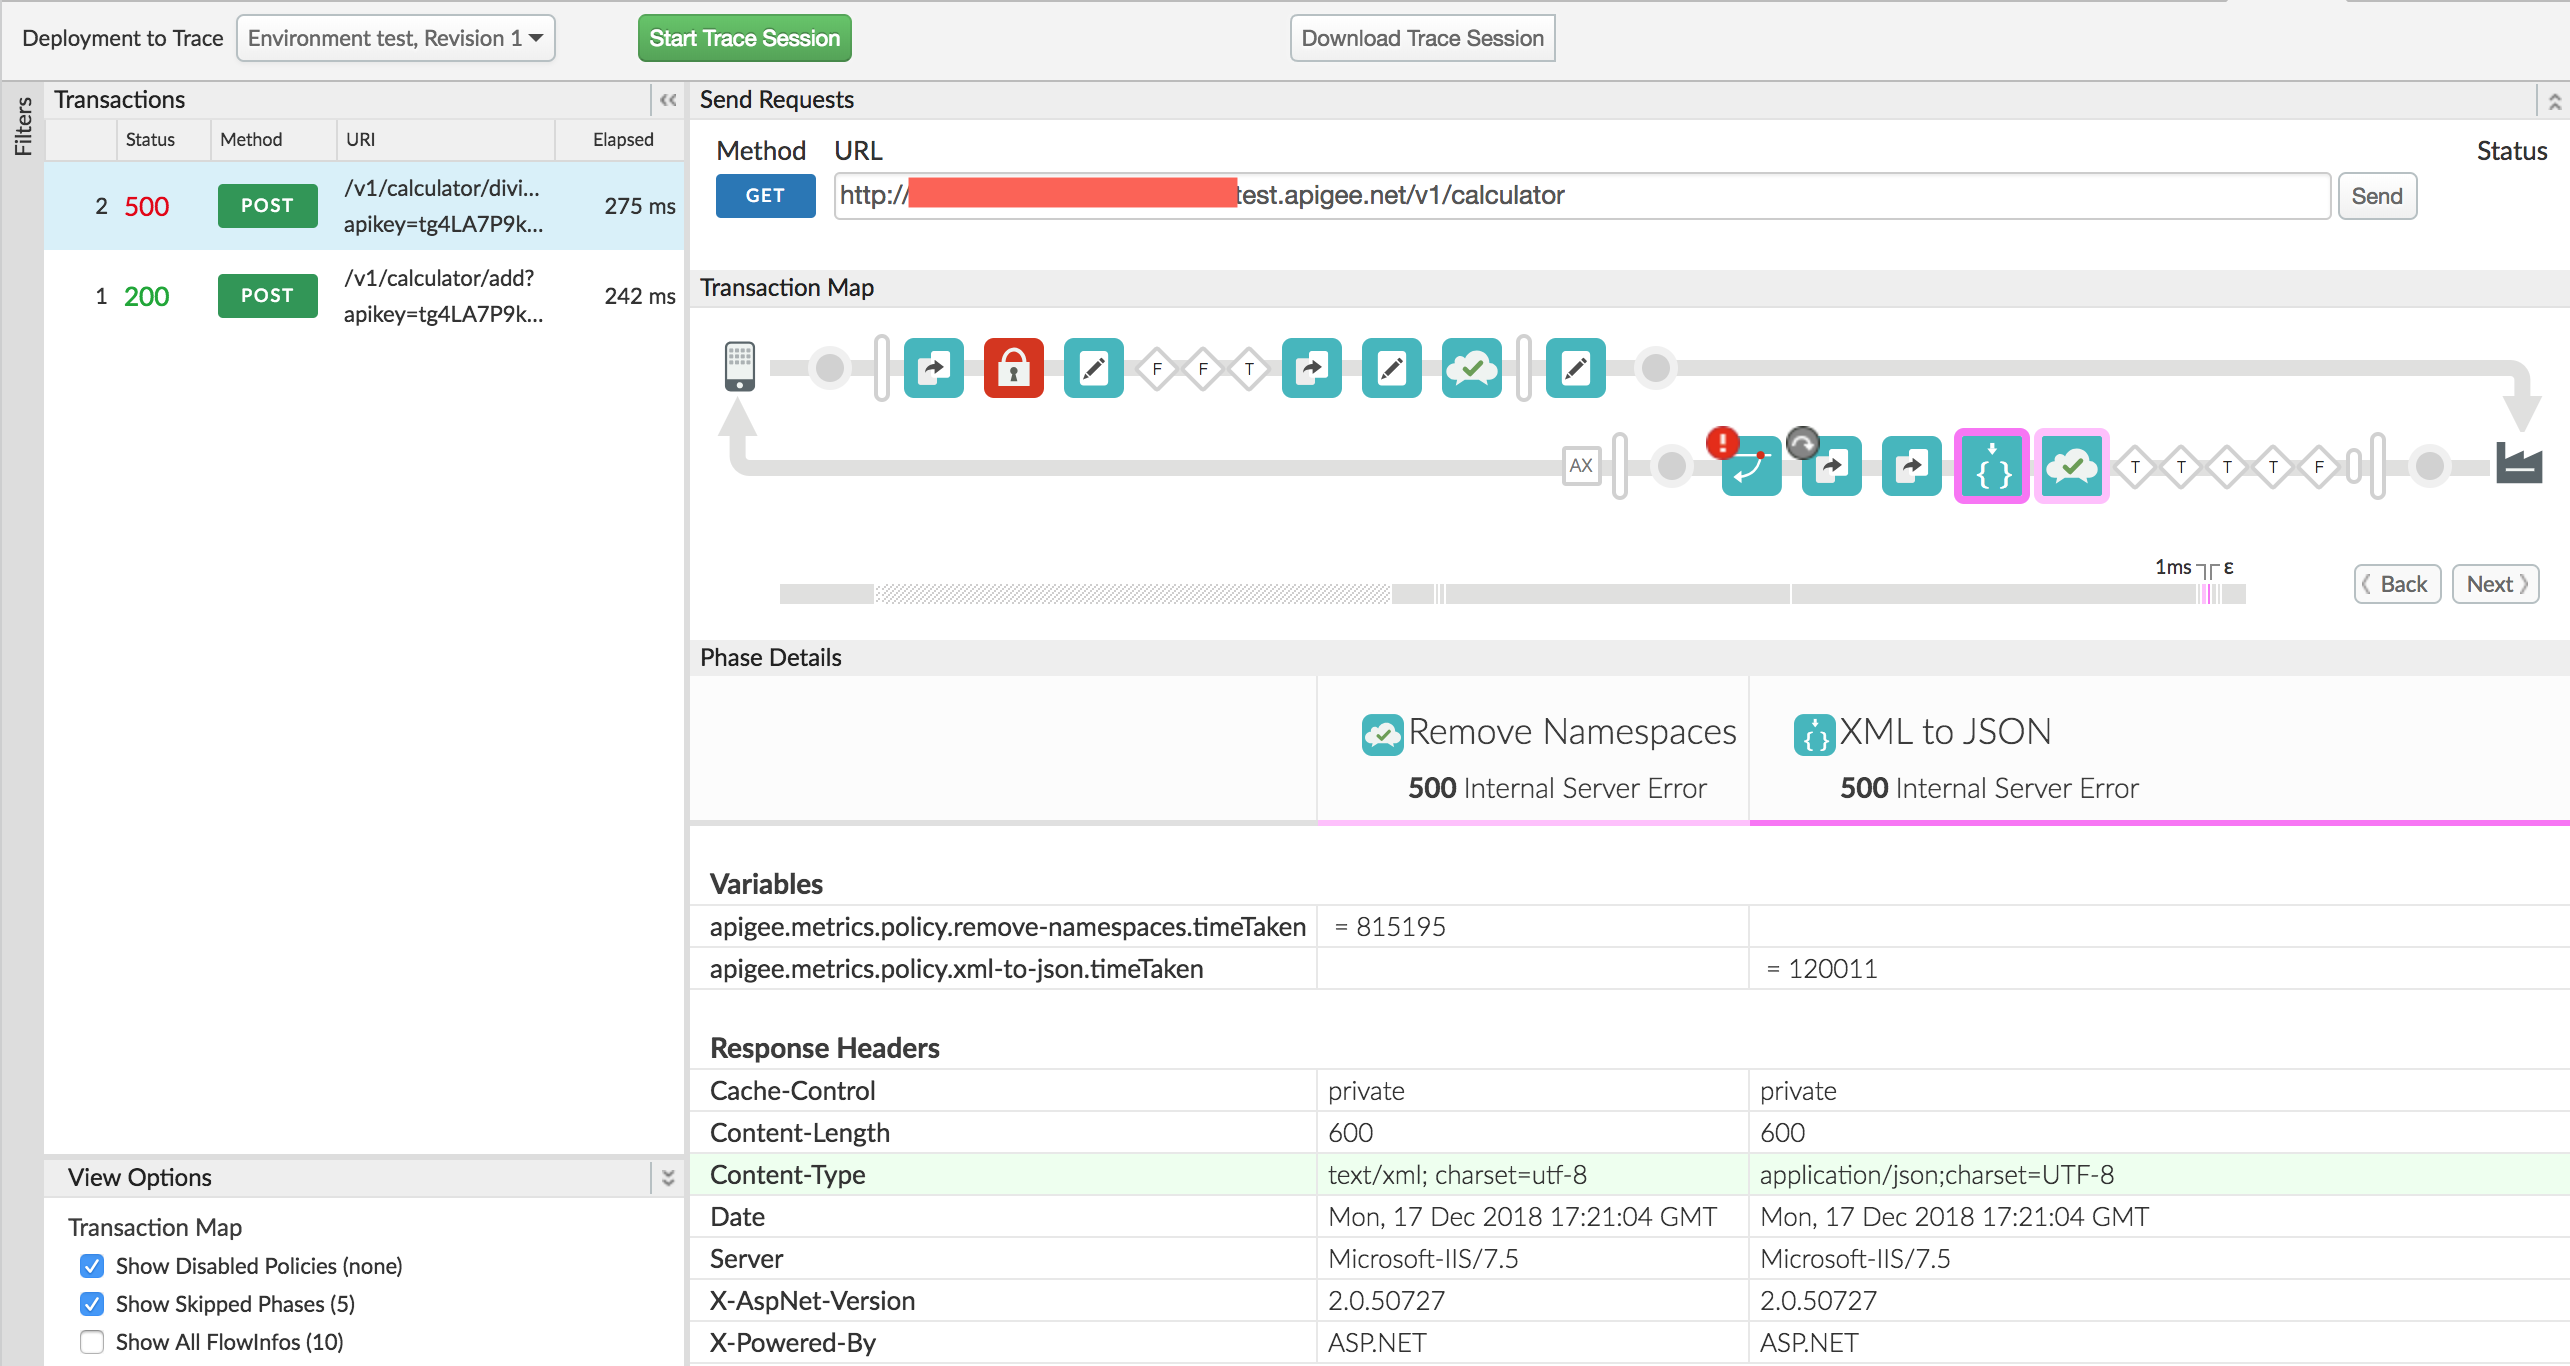
A cool feature available in the Apigee Edge web app is Tracing. Access it by going to the API details page and then select “Trace” tab. Tracing allows you to listen to API proxy calls and drill down into the request process pipeline and visualize the each step of the policy really well. One limitation I found was that the web app only allows you to send GET request. However, you can send the requests using postman or other tools and still capture it and visualize on the website.
Developer portal
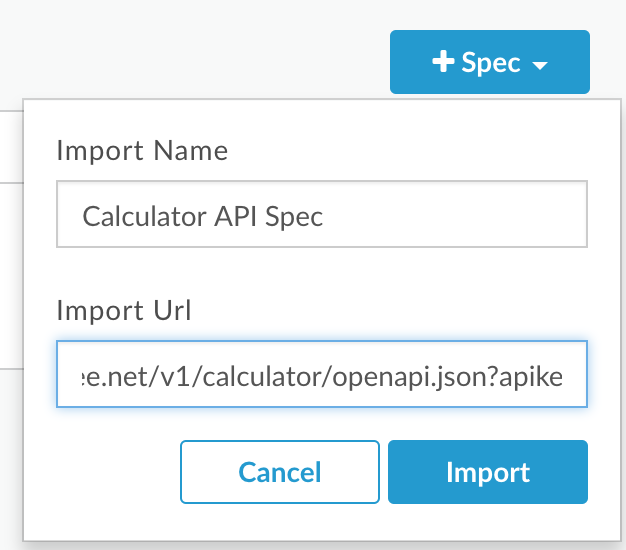
In order to add the API Proxy into the Developer Portal, you need to setup the API Specs manually. As part of the creation of the SOAP to REST api, an endpoint called the /openapi.json was also setup. Use this endpoint together with the ?apikey= ****** to create a new Api Spec from URL.
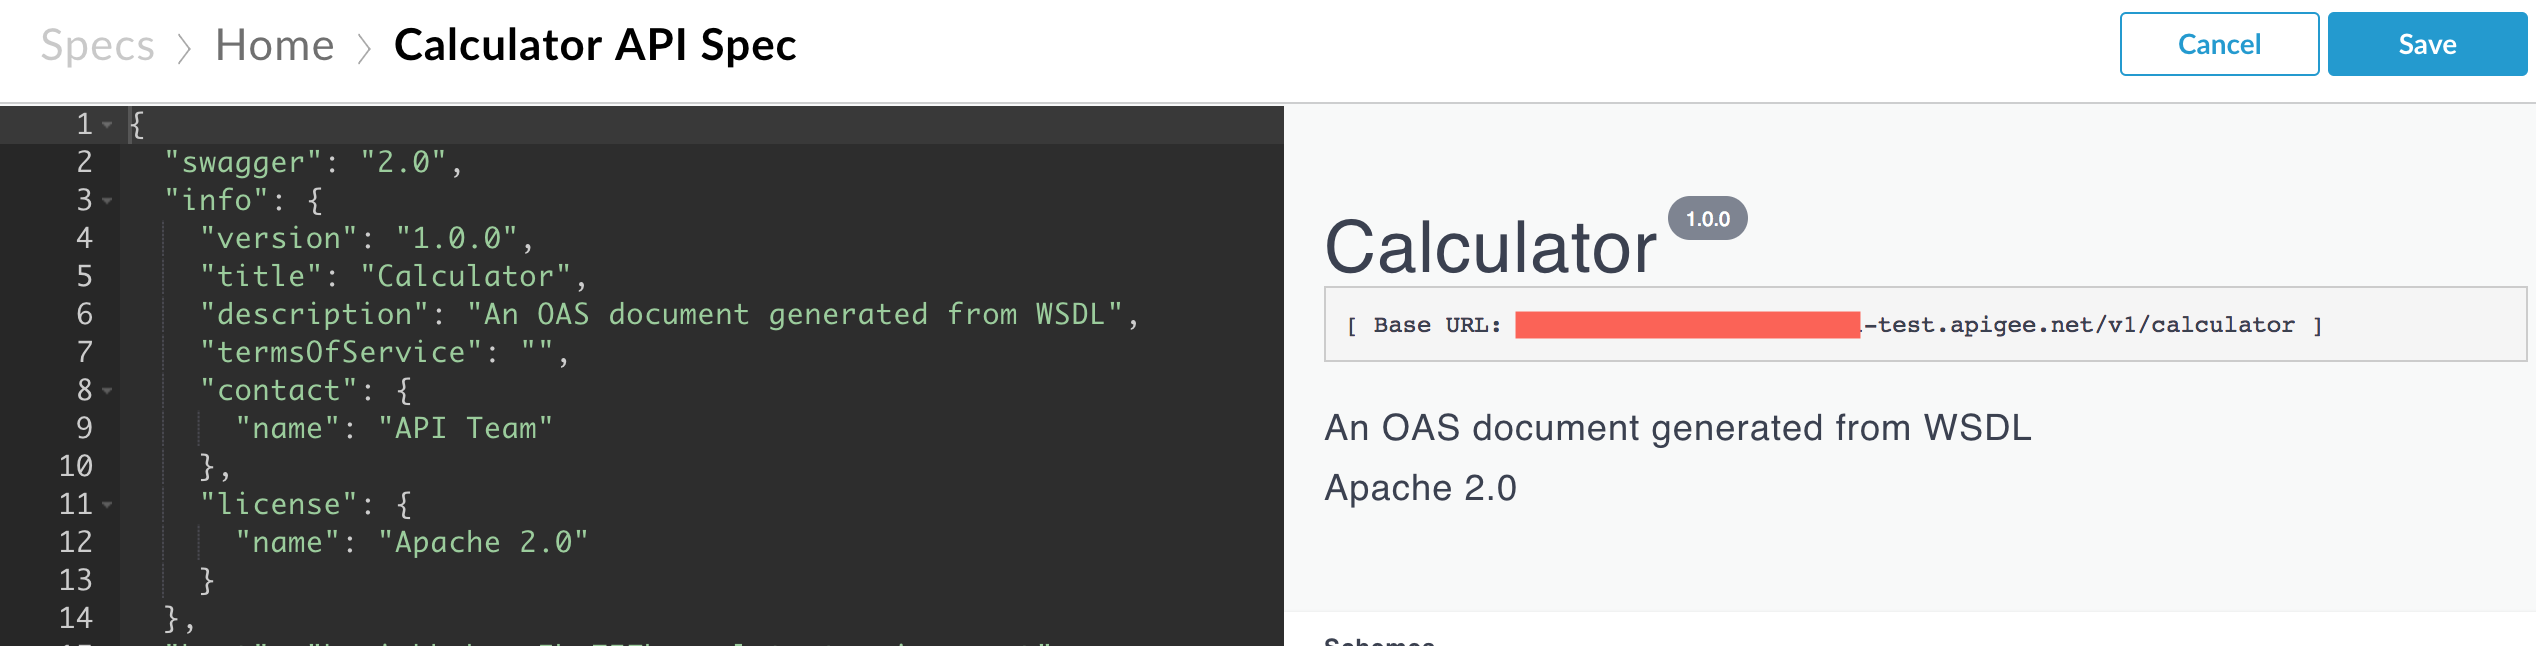
Now, that you have a successfully created the API Spec for Calculator, you will see a UI similar to the Swagger UI.
Even though, you have functionality to try out, it wont work as we said that we require an api key to make the calls. And there is no option available to pass in that parameter in the UI.
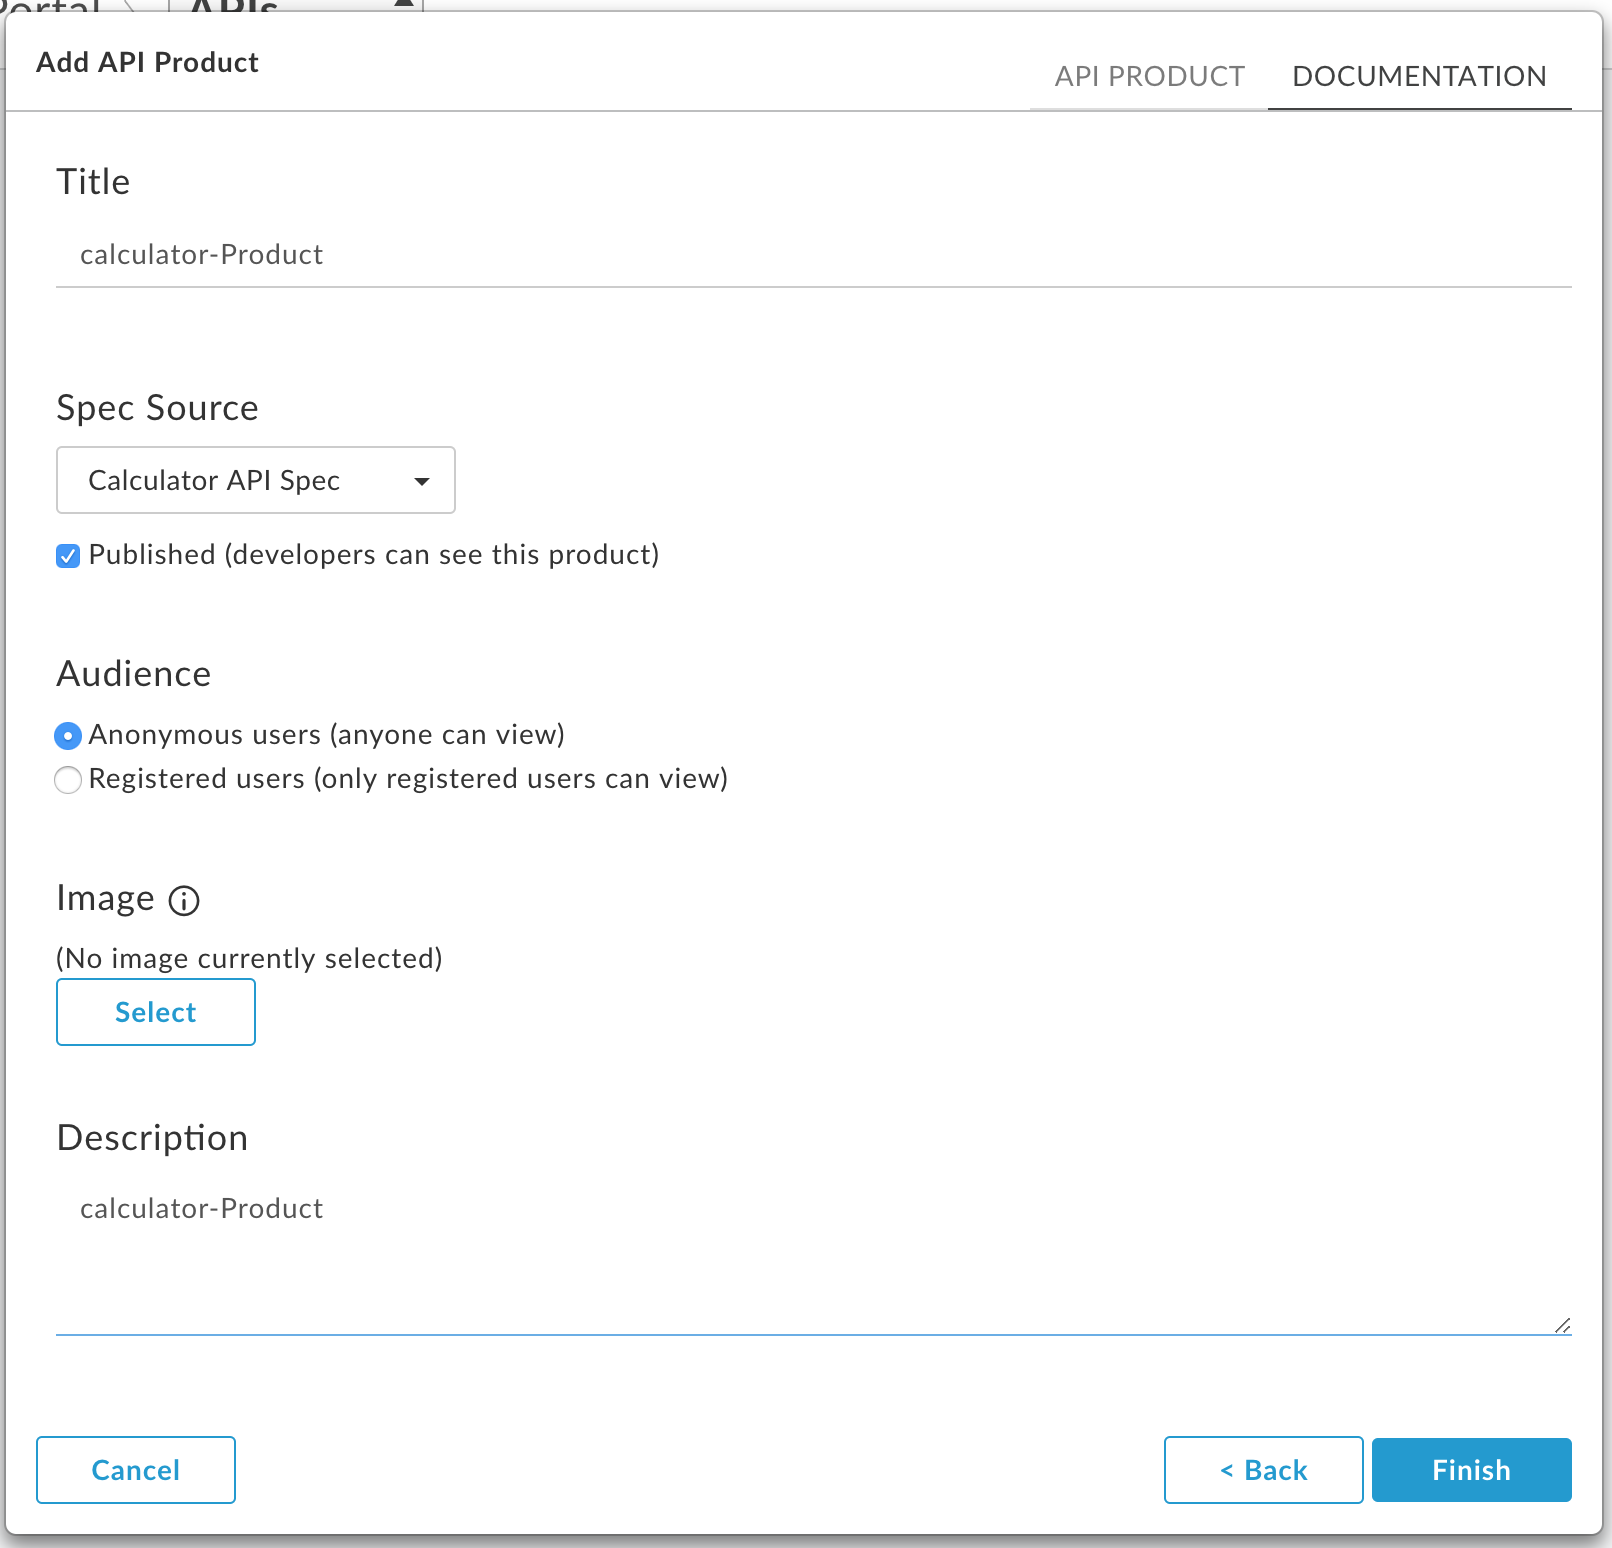
Now, that we have the spec, we can go ahead and create a portal Publish navigation section. I will give the portal some name. Afterwards, go ahead and add the Calculator API product from the Portal details screen. Note that I selected the API Spec we created above.
Navigate to the Developer portal by clicking on the “live dashboard” link at the top right hand corner. You can browse the site as an unauthorised user. However, you still won’t be able to try out the APIs if your api required a token. I tried registering a new user, logged in and even creating a new App to see if the API key will be picked up. But, no luck! You will have to modify the spec to incude a query string param apikey.
Even though I updated the spec file to include the apikey parameter in the query string, the developer portal wasn’t working.

Analytics
There is a navigation section entirely dedicated to Analyze the API proxy performance. With in the section, there are multiple categories such as API Proxy Performance, Cache Performance, Developer Engagement, Devices, Error Code Analysis, Geomap, Reports, Target Performance, Traffic and Composition. If there were multiple proxies, those are denoted as demensions in the various categories. You also have a drop down to select the environment.
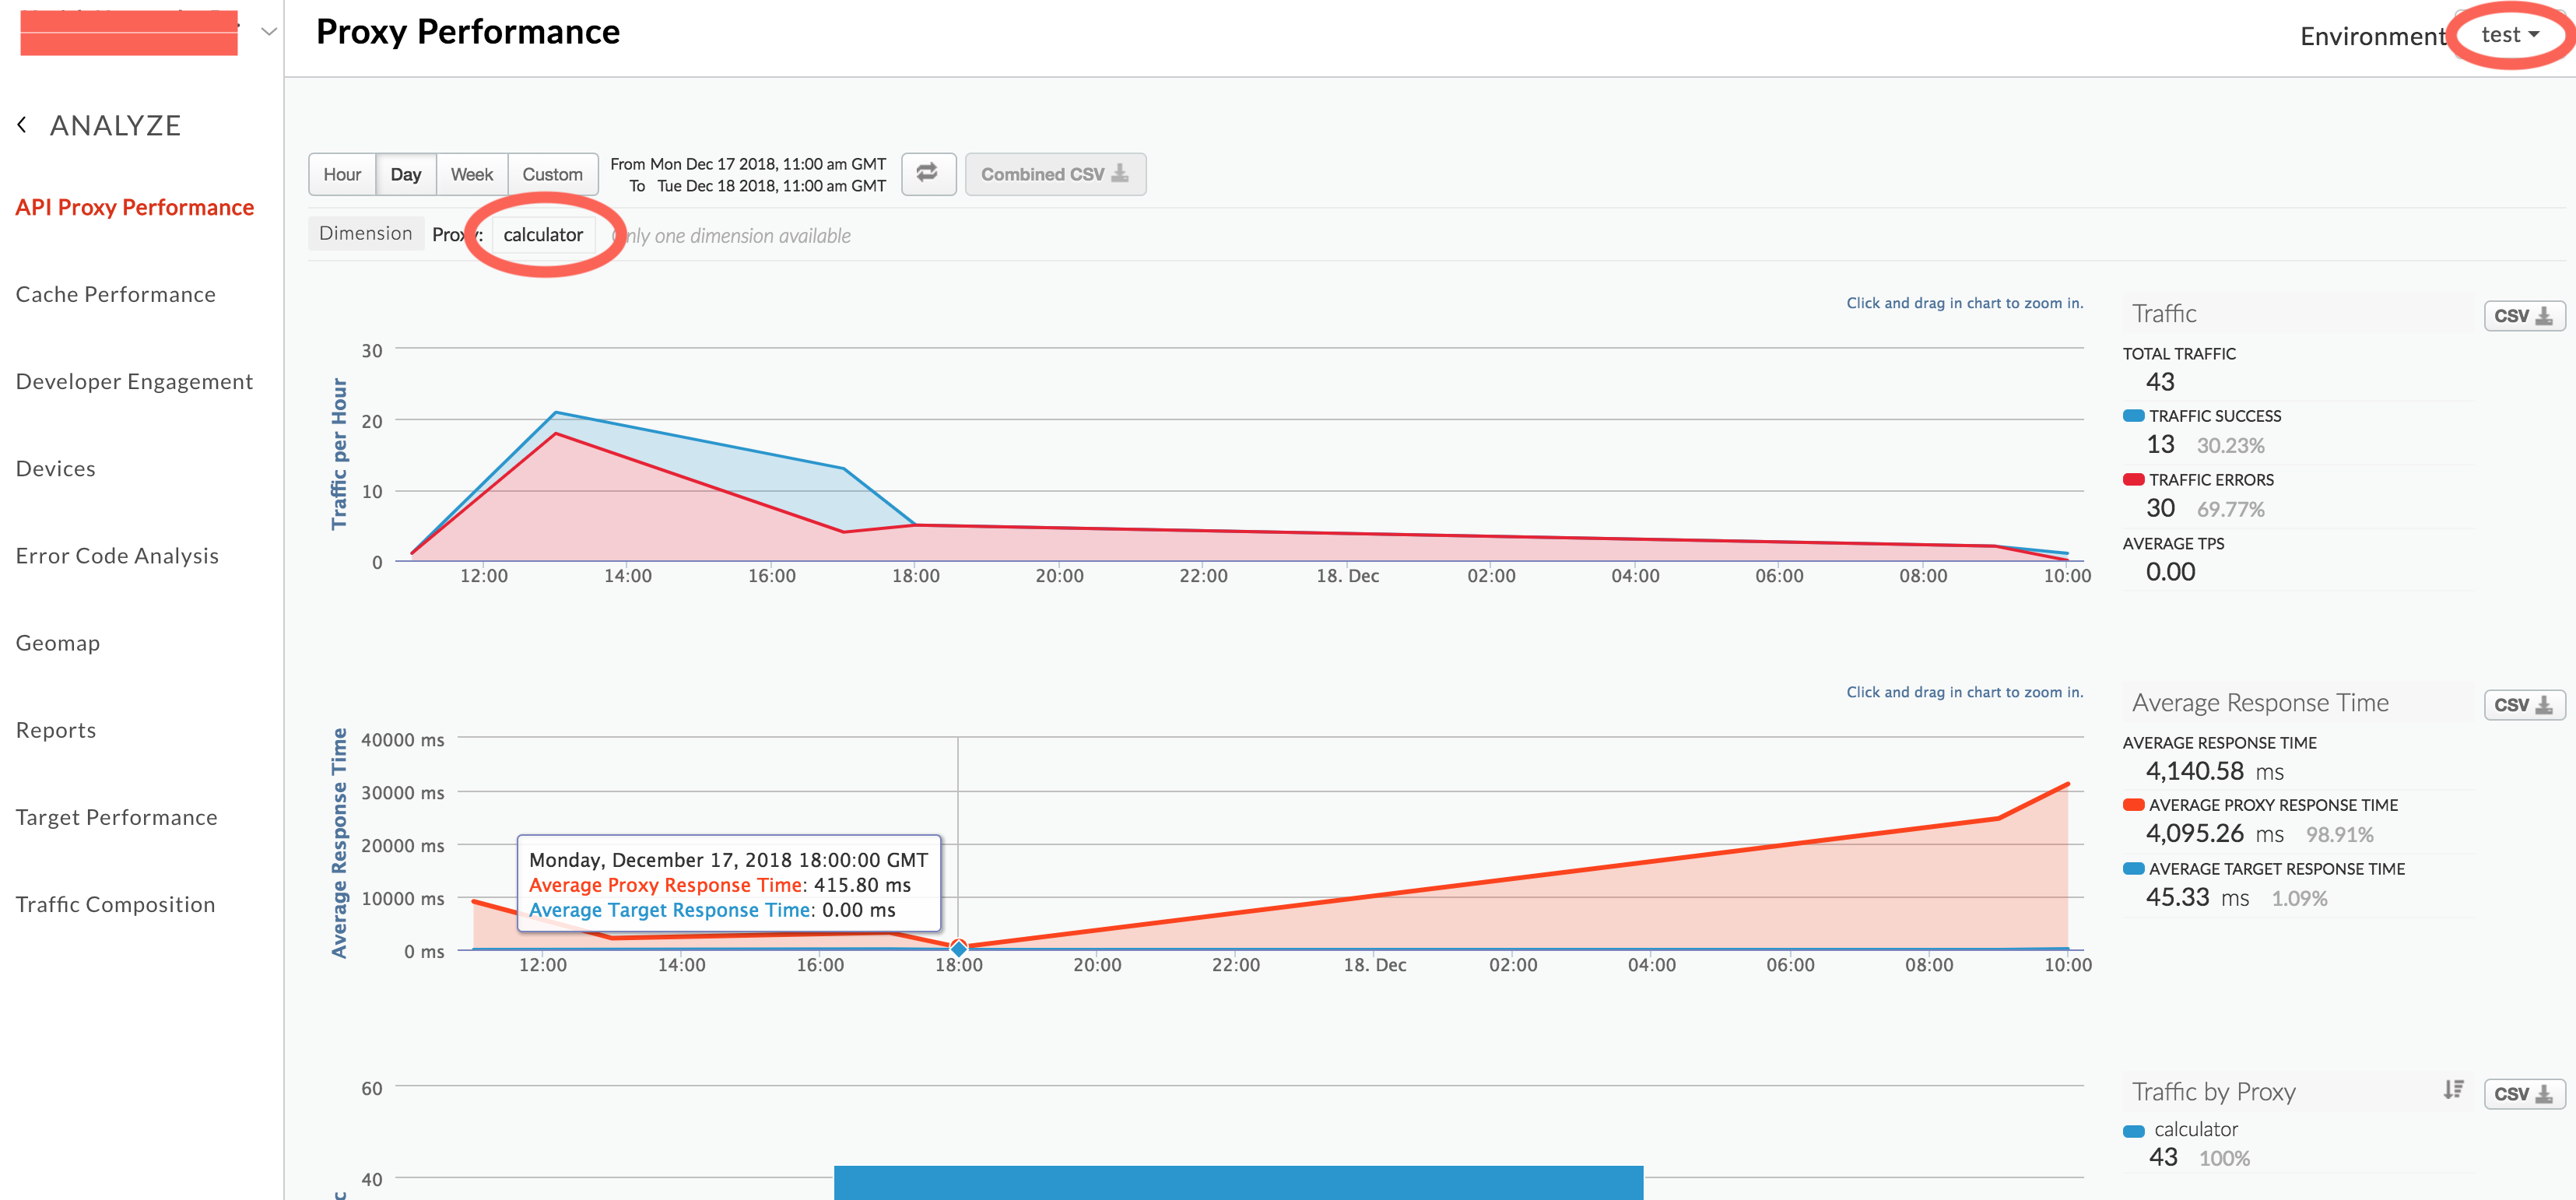
Even though there is a category called “Error Code Analysis”, there was no means of drilling down in to the errors themselves.